Welcome To My Blog - Digital Graphics

Tuesday, 30 November 2010

File Formats

JPG
RGB - 24 bits,
Grayscale - 8 bits
JPEG uses lossy JPG compression, but its degree is selectable. For a higher quality image but larger files, or lower quality images and smaller files.

GIF
Indexed color - 1 to 8 bits
GIF uses lossless LZW compression, effective on indexed color. GIF files contain no dpi information for printing purposes.

PSD
The PSD file format was created by Adobe. It contains graphics/photos created by image editing software such as Adobe Photoshop. The PSD file format is more popular as it can be used on a Macintosh or Windows.

PDF
The PDF (Portable Document Format) file format is a binary file which contains page description primitives and combines a subset of the Postscript language in the format. The PDF file is a page description language designed to enable the creation and transfer of printer-ready output.


Photographic Images
Graphics, including
Logos or Line art 
Properties
Photos are continuous tones, 24 bit color or 8 bit Gray, no text, few lines and edges
Graphics are often solid colors, up to 256 colors, with text or lines and sharp edges
For Unquestionable Best Quality
TIF or PNG (lossless compression
and no JPG artifacts)
PNG or TIF (lossless compression,
and no JPG artifacts)
Smallest File Size
JPG with a higher Quality factor can be decent.
TIF LZW or GIF or PNG   (graphics/logos without gradients normally permit indexed color of 2 to 16 colors for smallest file size)
Maximum Compatibility
(PC, Mac, Unix)
TIF or JPG
TIF or GIF
Worst Choice
256 color GIF is very limited color, and is a larger file than 24 bit JPG
JPG compression adds artifacts, smears text and lines and edges

Tuesday, 12 October 2010

Animated Banner

^^^^^^Click image above to see the animated banner ^^^^^^
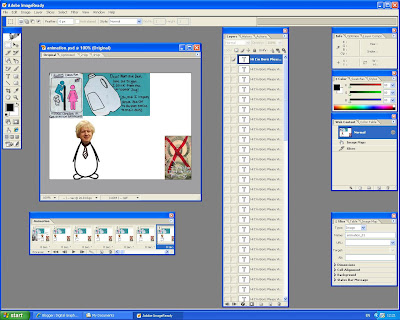
This is my web banner i have made in photoshop and imageready for post secret.
First was to create the backgrund and then image you were going to animate. In my case it was a stickman and Boris Jonhnsons head.
Next was to duplicate the layer and move the stickman slightly. Then to keep doing this over and over untill you are happy with your banner.
Then was to put this into imageready. Once all the layers were in imageready you then turn these layers into frames. After you are happy with your web banner you can save i/export it. You can either save as a gif or export it as a swf.

Tuesday, 5 October 2010

Newspaper Front Page

This was our most recent project to do. Make a newspaper front page. This too was made in Indesign.

First thing to do was to set the page layout to A3. next was to create the gides and the boxs for the text and images to be placed in.

After the layout of the newpaper was done it was time to add in text and images. It was the same way to add in text as i did on the Buster Keaton leaflet.
After text was put in it was time to add pictures and graphics. There where pictures to go with the stories and also the newspapers logo to be added in.
After everything was placed onto the newspaper front page all that was left to do was to, arange and slightly move everything to get it the way you want.

Tuesday, 21 September 2010

Buster Keaton Leaflet


This is my newest project. It was created in InDesign. I had a few problems along the way but nothing major.
These included:
- Could not get the text into InDesign
- Could not warp the text around the image

The first thing we did was to create the two columns on the page. Next was to import the image of Buster Keaton. We then masked around Buster Keaton with the pen tool.
Once that was done we re imported the image to cut out Buster Keaton from the image.

Next was to arrange the image to the bottom left hand side of the leaflet.

To bring text into InDesign we, created a rectangle in the left column and placed the text into that rectangle.

Then we had to warp the text around the image.
Once that was done we had to make a copy of the picture. We then cut out the image of that mask and placed the rest of the text in that mask. I then moved that mask into the right hand column.
After that all that was left to do was to change the font and size of the text so the text does not overflow. Also was to add a title and the leflet was done.

Tuesday, 14 September 2010

Animal Faces


I have created two different animal faces. These are made from two pictures. One of a person and another of your chosen animal.


The picture to the left was a picture taken of a memeber of my class and a picture from the web of a monkey. I then used photoshop to take different features of the person and put them onto the face of the monkey. I used the eyes and the mouth on this image.


The results of this image are quite good. They are suttle changes but work well. The eyes look like the belong to this monkey. I think the mouth could off turned out better but still works well.


The image below is a Dalmation dog with Boris Johnson's hair, eyes and mouth. I used the same technique for this as i did with the last image. But this time i took Boris's hair and arranged it so it would fit and look good on the dog :) The mouth to me seems to fit well and looks quite realistic. The two eyes do not fit to well to the dog but look okay.

These were the two images used to make the Boris Johnson dog :)